| Expert role Log in to AGM Accept the invitation Create an expenses claim | ||
| Add or change your bank details | Claim expenses for virtual meetings |
Start your claim
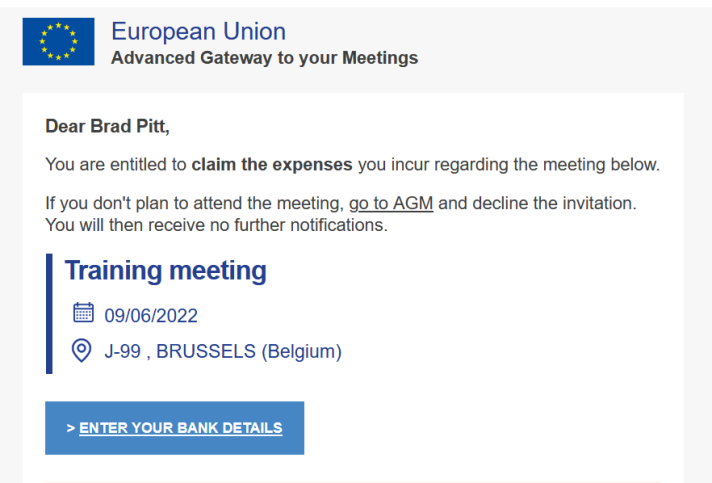
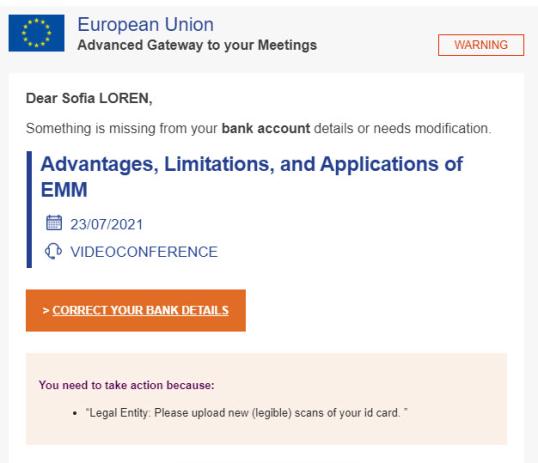
If you are eligible to claim reimbursements, AGM has sent you a notification like the one shown below. Look for an AGM notification with the subject Reimbursement of expenses permitted in your mailbox.
Click Enter your bank details.
This link directs you to your claim in the AGM front office after you authenticate with your EU-Login account.
If you already activated your profile for this meeting or claim, it is also possible to navigate through the Expenses claim menu of the AGM front office to the claim. After you navigated to your claim, click the Bank Details tab.

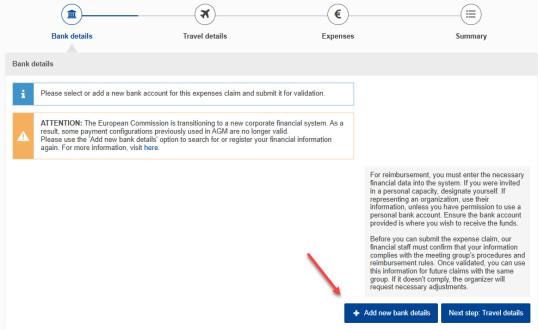
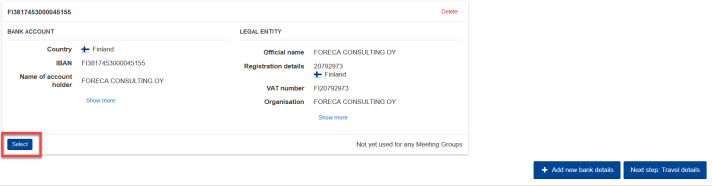
Scroll down in the Bank Details tab to find bank details that you have used in previous claims. Please note that bank details from before 2025 may no longer be valid due to the introduction of a new financial system with different requirements.
If you find appropriate bank details in the list, click Select underneath.

However, if
- you don't find appropriate bank details in the list, or
- there's no Select button underneath,
click the button Add new bank details (at the bottom of the page).
YOUR BUSINESS PARTNER
The term 'business partner' refers to the legal entity that will receive the reimbursement. It is possible that the business partner is already in the system because you entered it before, or, in the case of an organisation, your colleagues added it in the EC system in the past. This is why you may be able to simply select the business partner from the system.
The steps to do so are different for experts who were invited in their personal capacity as private individuals, and for representatives of organisations.
Private individual
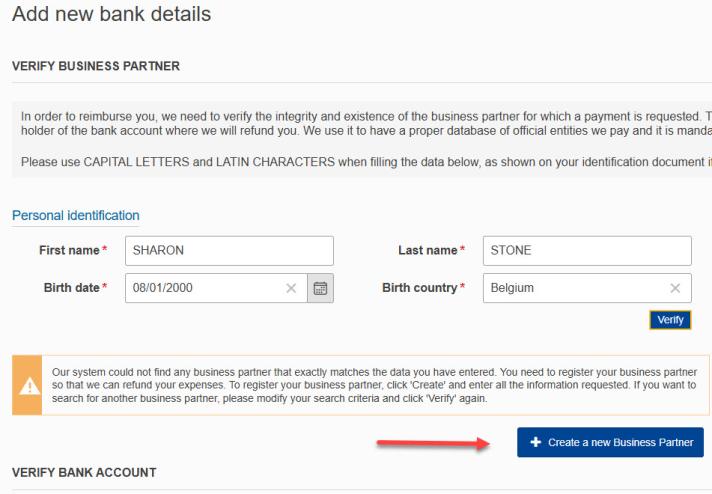
After you clicked Add new Bank details (see above), you are now in the Verify business partner section. On the right-hand side, there is a text describing the type of business partner (representation type) the organiser assigned to you (screenshot below). If you think that you are not participating in your individual capacity, please contact the meeting organisers (see invitation for their contact details).
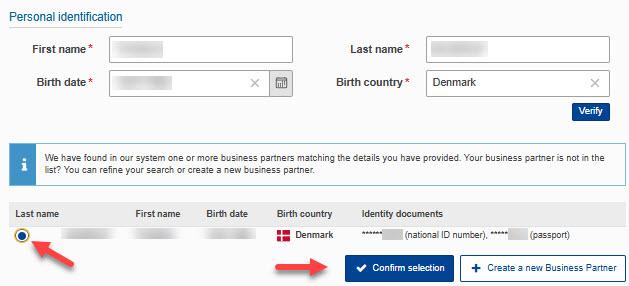
Fill in the details in all fields of the Personal identification form.
Click Verify.

You must run this search/verification check even if you know that you don’t yet have a business partner entry in the system. Only after the verification fails you will be able to create a business partner.
If you’ve already defined a business partner in the EU accounting system, please search with the same information you used at the time. Click Verify to start the search.
Results are displayed with the last digits of the ID that you provided. If you identified your entry, please select the option button before the family name and click Confirm selection.
If there are no matches for your business partner, you can
- click again Verify after entering different data in the personal identification fields (screenshot above)
- click +Create a new business partner (screenshot below) and continue reading How to create a business partner (private individual).
If you've found your business partner entry, continue reading to search your bank account.
Search bank account (private individual)
Select the country of the bank account in the Country field.

Select IBAN or Account number (depending on the selected country only one option may be possible). The bank account must accept payments in Euro.

Fill in the IBAN or account number, then click Verify.

If the bank account is not in the system, either click +Create a new bank account and create a new entry for the bank account in the EC system or click Refine your search.

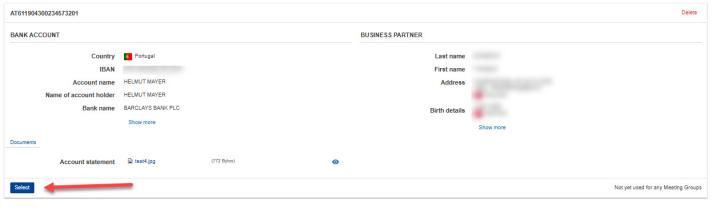
If the system has found the bank account, click Confirm under Confirm bank details.

Back in your bank account list click Select in order to choose the bank account for this meeting.
A blue banner is displayed to inform you that you’ve submitted your bank account for validation.

You can’t modify the bank account while it’s being validated.
You can continue with adding the Travel details but you can only submit the claim after the bank account details have been validated.This is a manual process and can take some time, depending on the workload of our financial staff. During validation your submission time counter is halted. If the validators ask you for changes of your bank account details, the counter will start running again until you've applied the changes and clicked Select again.
When the validation is successfully completed, AGM will notify you that you can continue to submit your claim by clicking the Submit button in the Summary tab of your claim.
If you cannot find a bank account in the system, continue by adding one as described in the Create bank account section.
How to create a business partner (private individual)
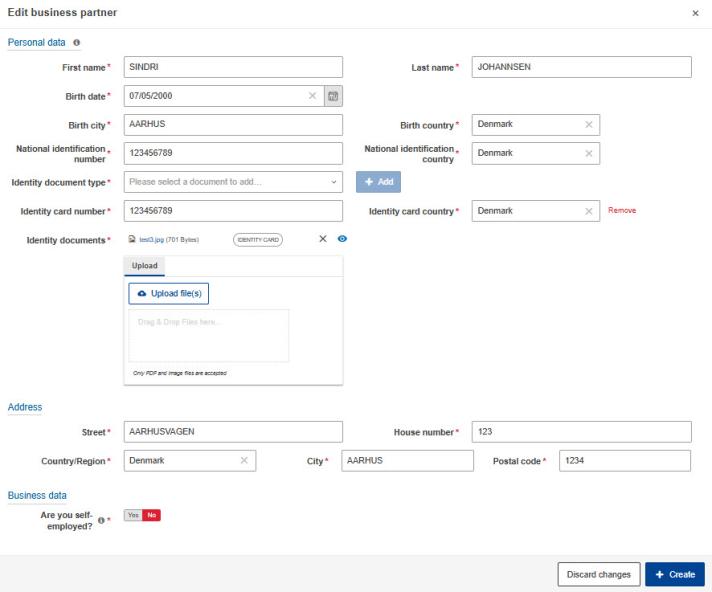
The Add new business partner form opens.
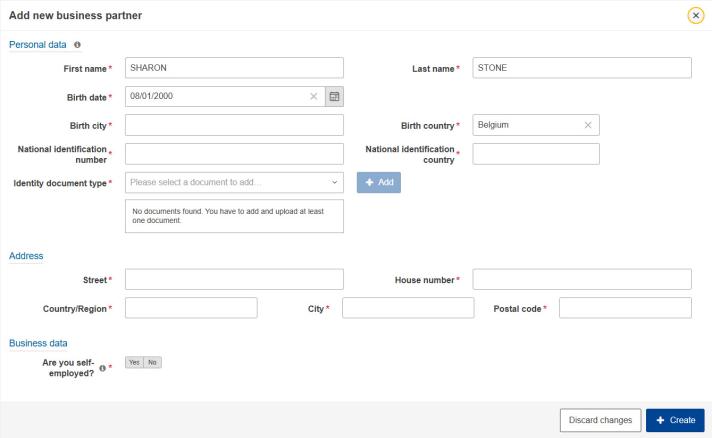
Personal data
Fill in all fields in this section
National identification
Not all countries have a national identification number.
- If entering a national identification number is mandatory for your country (e.g. Portugal, Sweden, Netherlands), you must enter it together with one other piece of ID, for example your passport number.
- For Italy, enter your fiscal code as the national identification number.
- For Portugal, enter your Portuguese ID card number (8 digits) without the document number (4 characters) in the National identification number field.
If your country doesn’t have a national identification number (e.g., USA, Germany), you can enter another type of ID along with the country name. If you're unsure whether a national identification number is required, fill in all other details in this form and click Create, then Confirm. If a national identification number is needed for your country, an error message will appear at the top of the page. You can then click Edit in the Business Partner section to add the national identification number.
Identity document type
Click into the Identity document type field and select the type of ID you wish to enter (one is sufficient).
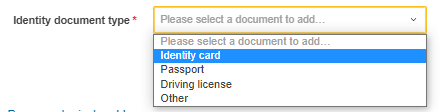
Click Add.

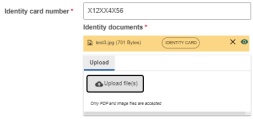
Enter the ID card number and the country.

Scan the ID document (if possible both sides). Click Upload file(s):

Select the scanned file from your harddisk.
Address
All fields are obligatory.
Business data
Select whether you are self-employed.
If you indicate that you’re self-employed, an additional menu appears. Fill in the registration number and upload the registration document. The VAT number is not mandatory but if you enter it, you must upload a VAT statement document.

Click Create. You will see a summary of your business partner data and can continue to create an entry for a bank account.
Please note that for a new business partner, you always must create a new bank account entry even if the bank account is already in the system for another business partner.

Organisation/Administration
Experts from private organisations, ministries, public bodies, or international organisations should follow the steps below.
Navigate to the bank details section of your claim. If there are no valid bank details from previous meetings, click Add new bank details at the bottom of the page.
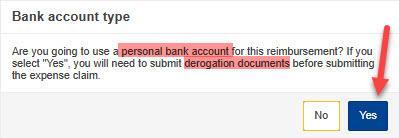
In the following pop-up, you need to decide which type of bank account you plan to use for your reimbursement.
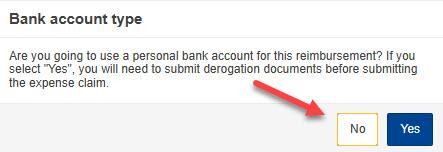
- Click Yes if you wish to use a personal bank account and have the written permission of your organisation. After clicking Yes, follow the steps for private individuals and then upload the permission.
- Click No to use the bank account of your organisation.
Search a bank account (organisation)
After clicking No (screenshot above), click the Country field to select your country from the list:

Select IBAN or Account number (depending on the selected country only one option may be possible). The bank account must accept payments in Euro.

Fill in the IBAN or account number and click Verify.

Check the box next to your business partner. Then click Confirm selection, to proceed to the overview page.

If there are no matches (or no suitable matches), you can
- click Verify again after entering a different IBAN or account number (screenshot above).
- click Search for a Business Partner (see screenshot below), and continue reading below.
- click +Create a new Business Partner (see screenshot below), and continue reading the section Create a business partner (organisation).

After clicking Search for a Business Partner, decide whether your organisation is a ministry (or an agency/governmental department without legal personality under a ministry).

- If you clicked Yes, continue reading below.
- If you clicked No, continue reading the section Search organisation.
Search a ministry
To search a ministry, enter its name or a distinctive part of its name. Only use basic latin characters.
- For EU countries, use the original (native) language.
- For non-EU member states, you may also search using the English version of the ministry’s name, if it exists or is commonly used.

Select the check box in front of your ministry and click Confirm selection.

You cannot create new ministry entries with the button +Create a new Business Partner (but private or public organisation entries). Ministries are already in the system and you probably need to refine your search. If you cannot find your ministry contact the AGM Support.
Search an organisation
In the menu below, you can search for your organisation in the EU accounting system.

You can search by VAT number,

by registration number

or, if you don’t know one of the numbers, you can search by name. Click the Official Name field to search with the name or parts of the name.

After entering one of the above search criteria, click Verify. The system searches for matches and returns the results.
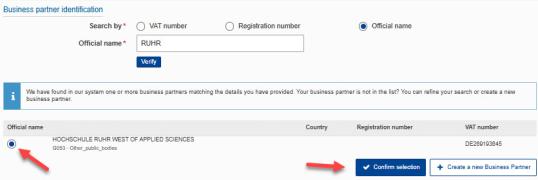
- To perform another search, change the values in the VAT, Registration number or Official name field and click Verify again.
- To choose an organisation from the results, select the appropriate check box and click Confirm selection (see screenshot a. Continue reading the section Create a bank account.
- If your organisation is not yet in the EC-system, click +Create a new Business Partner to add it. Continue reading below.
Create a business partner (organisation)
Select whether your organisation is private or public.
Enter the name of the organisation with a maximal length of 40 characters.
If you enter a registration number, you must also upload the corresponding registration document. Similarly, if you enter a VAT number, you will need to upload a VAT statement document as well.

The system checks the registration number and VAT number you entered. After you’ve filled in the details correctly and clicked Create, the following screen appears:

Click Edit to change information in the Business Partner form. Once you’re satisfied,
- click +Create new bank account, to create a new bank account entry in the EC system. Continue reading in the section Create bank account.
- click Refine your search, to search for bank accounts that are already in the EC system. You can change the data you initially entered and click Verify to run a new search:

Create bank account
You already verified your business partner. Now, click +Create new bank account.

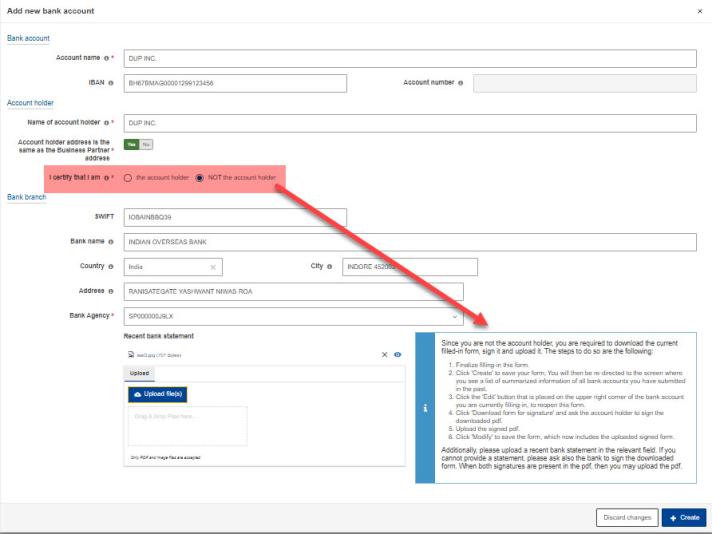
The Add new bank account form opens:

If the account holder name and account name are different, this needs to be reflected by the supporting documents (bank statement and/or financial information form).
The IBAN or account number you searched for earlier is prefilled and cannot be changed in the form.
Depending on whether you are the account holder, there are different requirements regarding the supporting documents:
- If you are the account holder, upload a recent bank statement (max. 6 months old). It should confirm the information that you've entered under Account name, Account number/IBAN and Bank name and click Confirm.
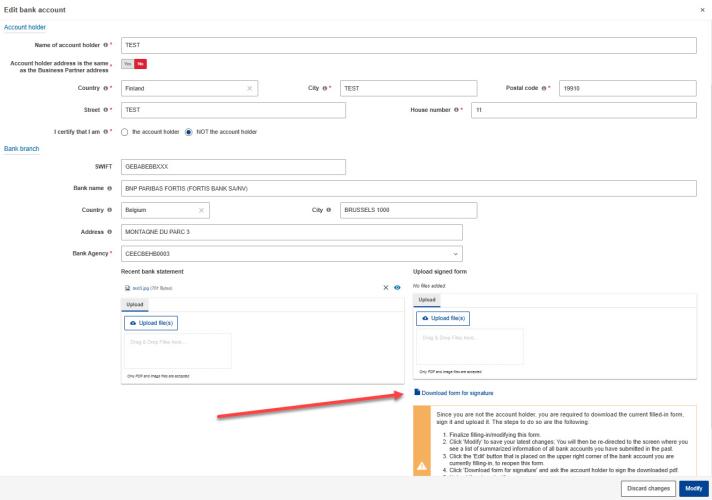
- If you are not the account holder, fill in all details and click Confirm. Then provide the financial form signed by the account holder (and the bank unless you can also provide a recent bank statement) by downloading the form and uploading it signed. But first read how to fill in the other details.
After entering the SWIFT code or address data, you must select a bank agency. If it's not listed, select the headquarters.
1. Find bank agency with the SWIFT Code
- You can find your SWIFT code through your bank or on the internet.
- A SWIFT code should be 11 characters long. If it's only 8 characters, the system will append XXX at the end to reach 11 characters.
- If you enter a SWIFT code, you don't need to enter other address data
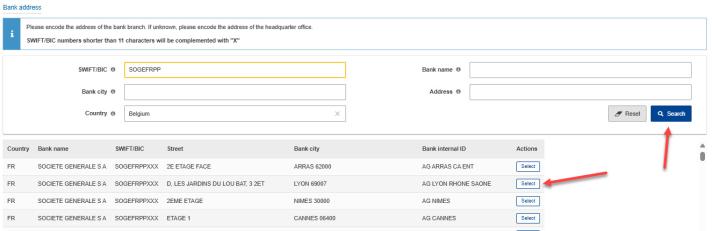
2. Find bank agency with address data
- Enter a keyword in the Bank name field. Avoid entering too much information. Try with one keyword per field. Your input acts as a filter for the bank agency selection.
- In all text fields, remove trailing spaces before or after your text (often spaces are added when you copy and paste text).
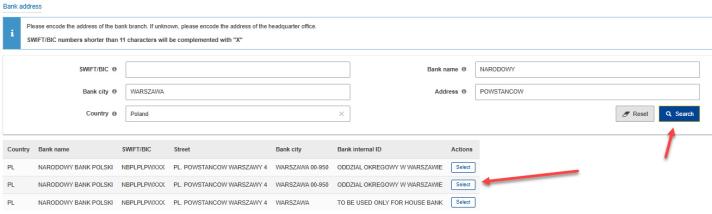
Select a bank agency. Then the details are automatically filled in:

Once you click Create to save your details in the Add new bank account form, you will be redirected to the overview page.
Download/upload Financial information form
If you are not the account holder, you need to first obtain and upload the signed financial form before clicking Select.
To download the form with your pre-filled data, click Edit in the bank account section (as shown below).

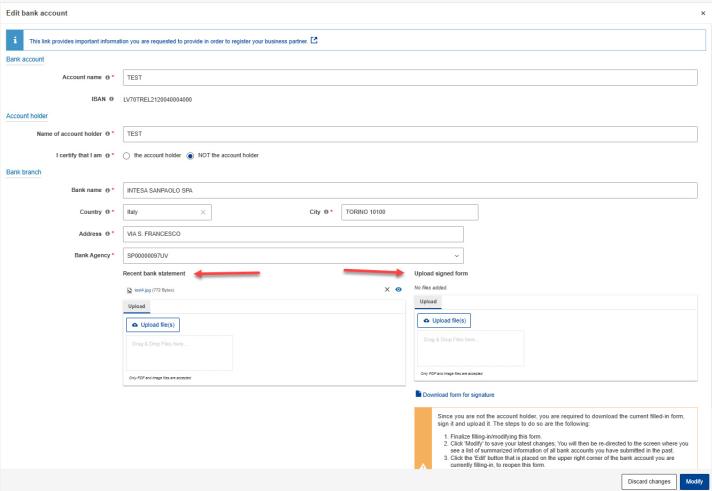
In Edit bank account form, click Download form for signature:
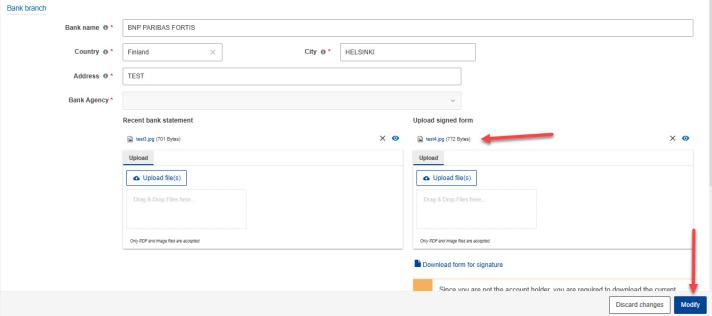
Upload the completed financial information form in the Upload signed form section, then click Modify:
- Click Select below the bank account that you want to use for the meeting.
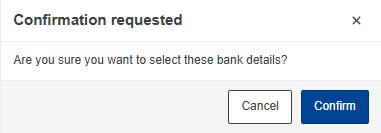
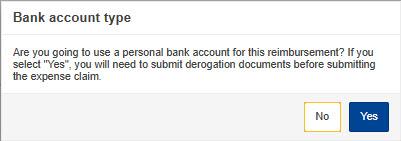
The next prompt is a confirmation:
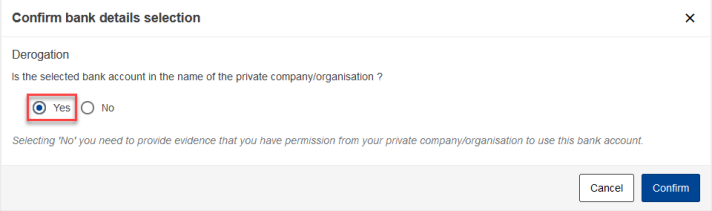
You will only see the pop-up below if you were invited as representative of an organisation. If the account is in the name of your organisation select Yes.
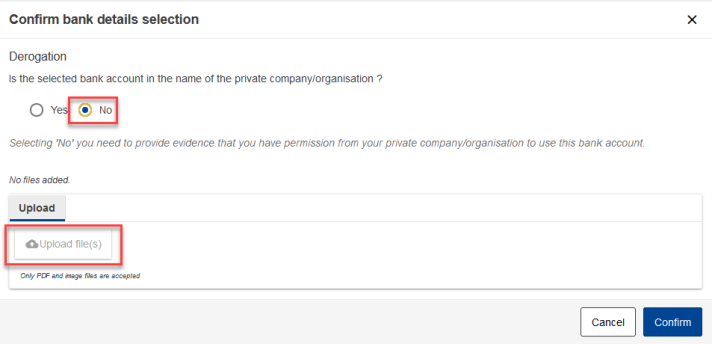
If it's a personal account, select No in the pop-up menu (see Uploading a permission to use a personal bank).
A blue banner is displayed to inform you that you’ve submitted your bank account for validation.

You can continue with entering the travel and expenses details but you can only submit your claim once our financial staff have validated your bank details. You will receive a notification when this is complete. The validators may also request corrections of your bank account details.
Overview page
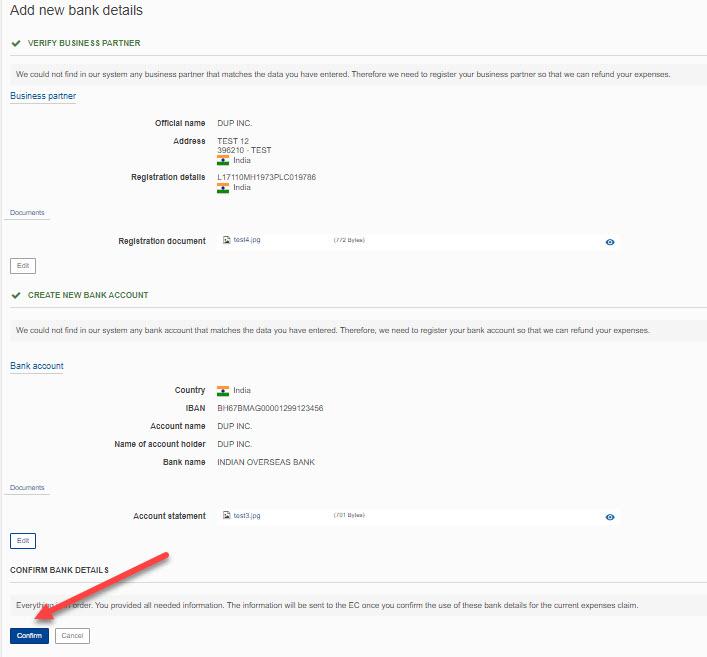
Click Confirm to add the new financial information to your list of bank details, so that you can then select them for this claim.
If an invalid number is entered in the Business Partner or Bank Account form, an error message will appear at the top of the page. This message explains the correct format, such as for a postal code:

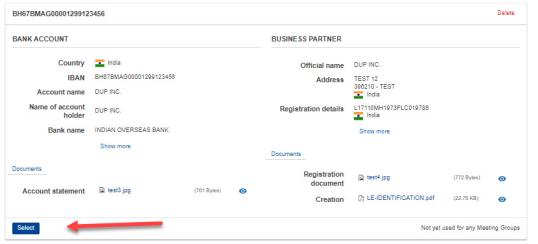
If the data is fine, the list of bank accounts is displayed. Scroll down to the bank account that you want to use for this claim.
If you are the account holder, click Select beneath your bank account:
Upload derogation for personal bank account
According to European Commission rules, representatives of an organisation or administration (such as a country, ministry, public body, international organisation, company or other private organisations) should either
- use an organisational account, or
- upload a derogation (permission) from your organisation that authorises the use of personal bank details.
Click Add new bank details (see Start your claim). As a representative of an organisation or an administration, you will see the pop-up shown in the screenshot below. Please click Yes to proceed using your personal bank details, with the required derogation (permission).
Next, follow the steps for private individuals to add your personal bank details to the EC system. Once your bank details appear under the Bank details tab, click Select beneath them and upload the permission as instructed below.
Click Yes.
The window shown below pops up, allowing you to upload the derogation from your organisation by clicking the Upload file(s) button. Once you have uploaded the necessary document, click Confirm.

You should see a blue information bar indicating that you have submitted your bank details for validation.

You can continue with entering the travel and expenses details but you can only submit your claim once our financial staff have validated your bank details. You will receive a notification when this is complete. The validators may also request changes of your bank account details.
CHANGE BANK DETAILS
Correct business partner
Your legal entity is part of your bank details. During validation you might receive an AGM notification asking you to change the legal entity. Click Correct your bank details.
Click the Bank details tab in your claim:

and scroll down to the bank account you’ve been asked to modify. Click Edit in the Business partner section.
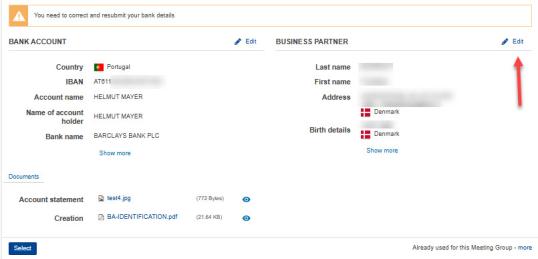
The Edit Business partner form appears. Apply the requested modifications then click Modify.
A list of the bank accounts you introduced to AGM is displayed. Click Select below the bank account that you want to submit for validation.
This is important because your claim will only be processed after you’ve clicked Select.
Correct bank account
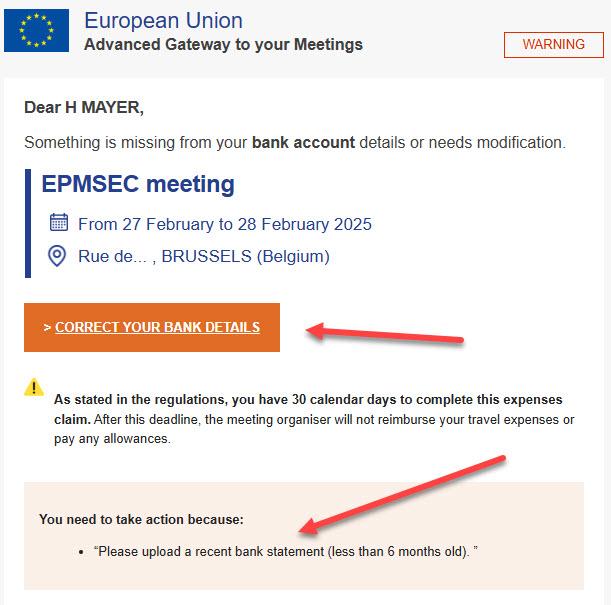
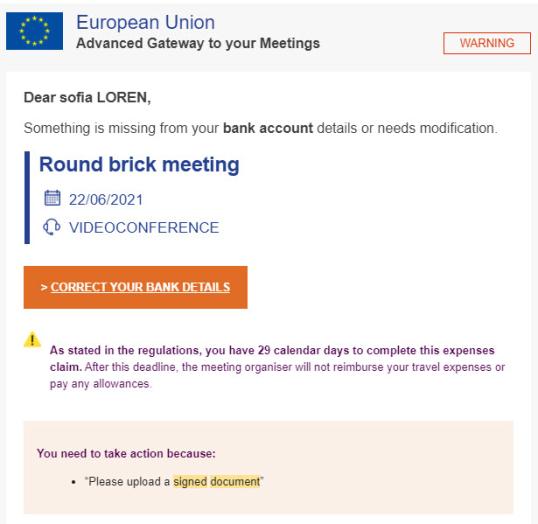
Your bank account details are currently being validated. You might receive an AGM notification asking you to correct and resubmit them. Click the link Correct your bank details.
The link Correct your bank details takes you to the Bank details tab in your claim.

Scroll down to the bank account you’ve been asked to modify. Click Edit in the Bank account section.
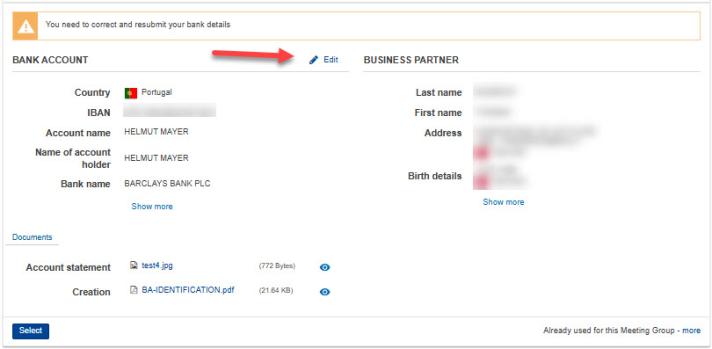
The Edit bank account form appears. Apply the requested modifications, for example upload a recent bank statement or upload a signed financial information form, then click Modify.
The list of the bank accounts you introduced to AGM is displayed. Click Select below the bank account that you want to submit for validation.
This is important because your claim will only be processed after you’ve clicked Select.
Click Next steps: Travel details to fill in further details about your claim.
Provide new bank details
Sometimes it is not posible to change information in bank details that you submitted. In that case the financial staff will ask you to add new bank details:
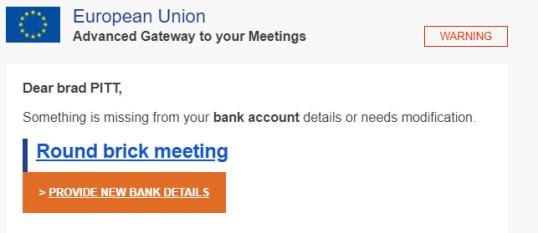
The link Provide new bank details will bring you to the Bank details tab of your claim. Scroll to the end of your bank account list and click on the button +Add new bank details.

Request for derogation
The EC financial staff might contact experts of an administration or organisation in respect to their derogation (permission) for the use a personal bank account:
The link Correct your bank details takes you to the menu below. Click Submit derogation, to upload a new derogation.
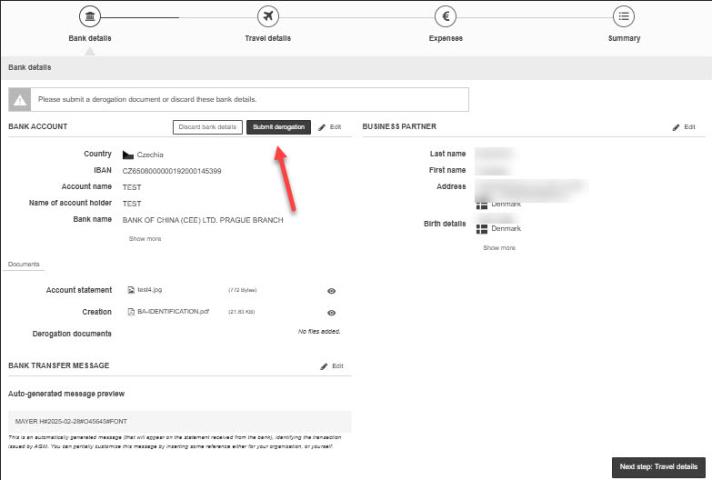
Click Upload file(s) and upload the derogation document. Click Confirm.

The blue information bar informs you that the bank account is now submitted for validation with the new derogation.
